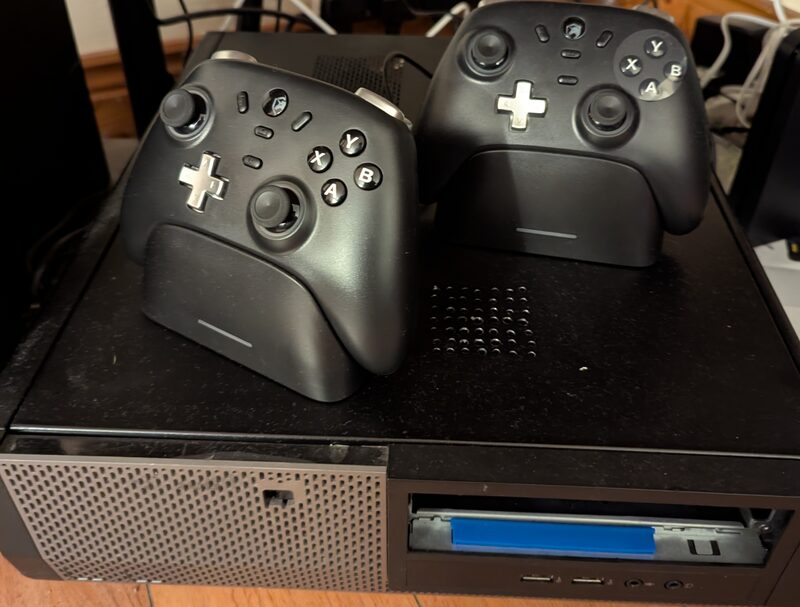
Have you ever looked at your TV and thought to yourself, "That bad boy needs an ugly, hot, jagged box underneath it that can just about play video games?"
I most certainly have, and I've spent the best part of a year planning, prepping and perpetrating this crime against computing.
The goal of this project is to make a cheap but reasonably effective console like gaming experience for a living room TV.
The basic plan to achieve this goal is as follows:
- Find crappy old office PC
- Jam GPU into case that's way to small
- ???????????
- PROFIT!!!
Follow this guide and all this could be yours!! *
-------->
*You cannot have my computer but yours could look the same lol.
Your results may vary depending on choice of base system, sharpness of drill bit, charge state of drill battery, luck and general handiness.
I give this project a 5* rating for keeping old crappy computers out of landfill.
Finding the perfect PC for this project was unlikely with my budget constraints (very little - £0)
I had previously made use of an HP Elitedesk 800 G2 mini as a light gaming/emulation machine however that system is now being used as a mini server so I had to find something else.
Ideally I'd find something that was:
- Powerful
- Reliable
- Efficient
- Aesthetically pleasing
Unfortunately all I had to hand was an old SFF (Small Form Factor) Dell Optiplex 3010 with a second gen i5, an Nvidia GT710 and a pocket full of dreams.
I know what you're thinking, that's a pile of absolute junk that belongs in a landfill...
Fear not though, for with the power of love and friendship anything is possible.
(Your mileage may vary if only using the power of love and friendsip. I recommend spending a little bit of money as well.)

I accidently filled the background with lightning but it looks cool so I'm running with it.
Upgrading the CPU was cheap and easy, I got a used i5 3470 on ebay for around £8.
The biggest problem that I had was finding a GPU that:
- Didn't suck.
- Wouldn't bankrupt me.
- Fit into the case.
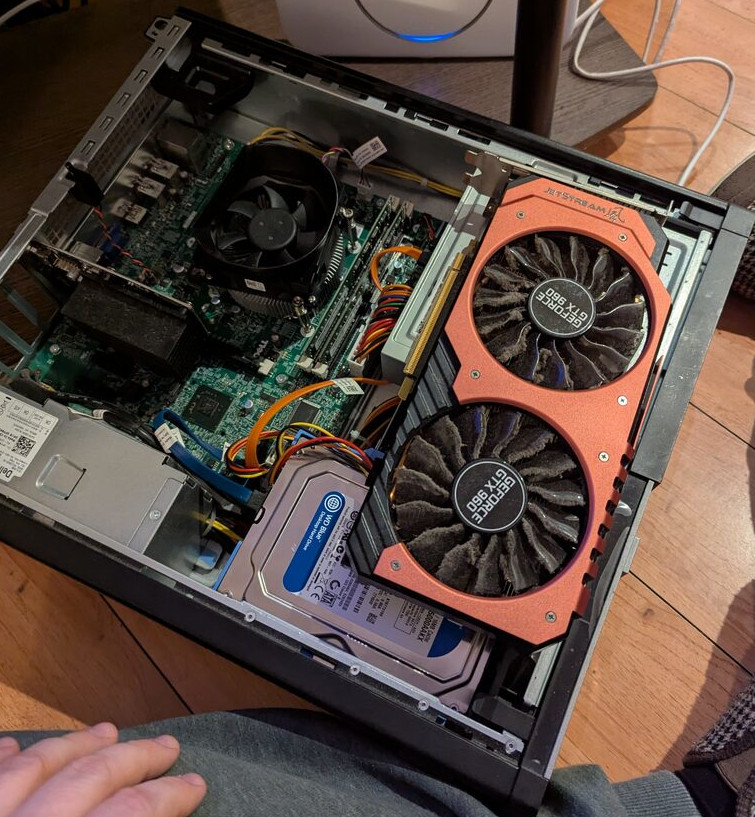
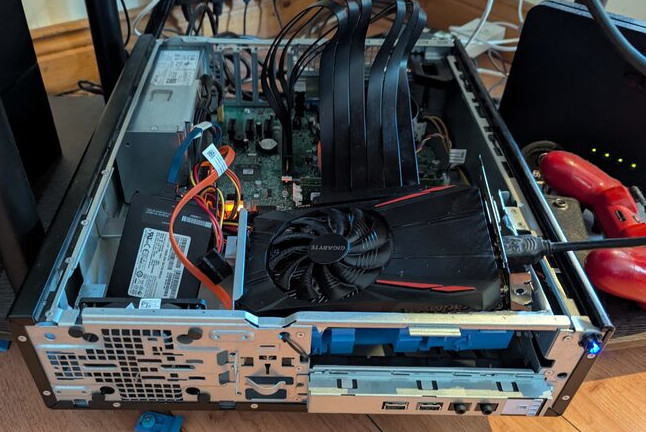
As you can see, I did have a GTX960 handy however as perfect as it might look, I couldnt quite get the lid on with this gpu.
<-------
Turns out there were other components in the way, why anyone would ever need a DVD drive or a place to store a HDD in a computer is beyond me...
The solution was obvious really, just buy a GPU that fit, right?
WRONG
The solution was blood, sweat, money, tears,
And a brand new set of aluminium shears.
After coming to terms with the fact that my GTX960 wasn't going to fit. I quickly realised that I was going to have to spend some money on a new (to me) GPU.
After some deliberation I decided that my best bet was either an Nvidia GTX1050ti, robbing a bank or winning the lottery.
I decided in the end to opt for the GTX1050ti due to its low cost, low power demands and it's low likelyhood of getting me in trouble with the police.
The 1050ti is also still more than capable of some decent 1080p gaming, which is all I need!
Although there are versions of the 1050ti that would fit in this PC (look up low profile gpu's), they seem to be pretty hard to come by at the moment, and usually they're considerably more expensive.
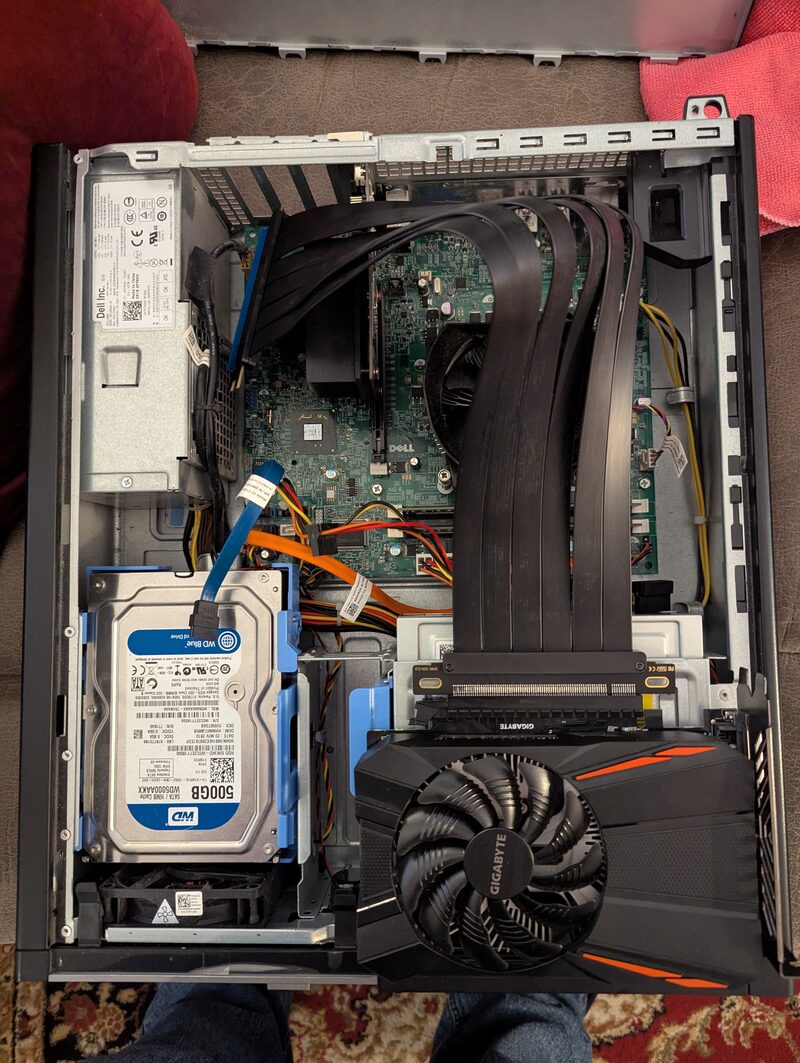
I opted for this one ------->
With a little (ish) bit of chopping and hacking and cutting it would fit in great right where the DVD drive used to be.
I would recommend trying to at least get one of the shorter single fan models like I did if you can.
You could hack away at the HDD bay area as well but that space'll come in handy if you need a bit more storage for all the games you'll be playing soon enough! ;)
Once in place I could use a PCIe riser/extension cable to plug that bad boy in.
I got this GPU for around £50 if I remember correctly, I've seen them go for cheaper but I think £50 is reasonable.
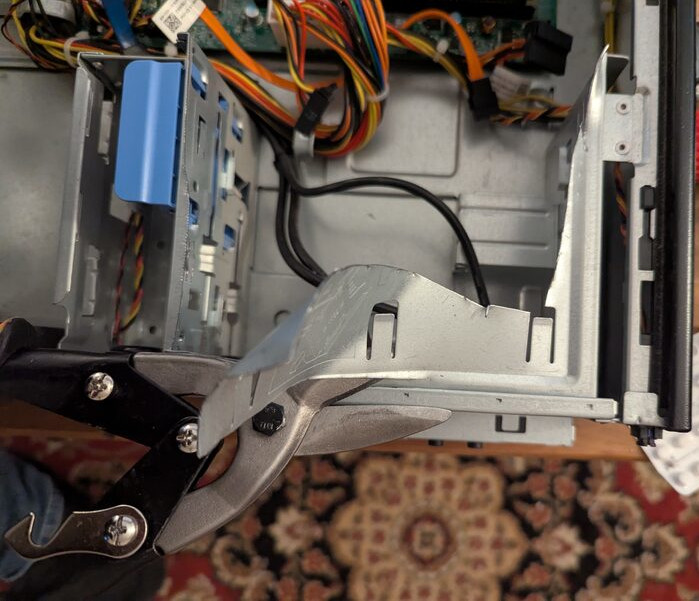
I got these shears for around a tenner at The Range I think...
They were pretty great for this project, though I'd very happily take any suggestions for other sheet metal cutting tools.
An alternative could be a dremel/other rotary tool which is likely to be a LOT messier but could probably yield cleaner results in the end.
Another tool I used quite a bit was a big old set of plumbing pliers.
They came in very handy when it came to folding over some of the jagged bits of metal jutting out from where I'd made my cuts.
I'll not go through the whole process of removing the disk drive, there are plenty of guides online for that, not to mention the official manufacturers maintenance documents.
But once it had been removed the rest of the process was relatively simple, cut and hack away whatever was left of the case that would get in the way of the GPU.
My main advice at this point would be to remove the motherboard from the case. I didn't do this and it made it very awkward to cut into certain areas.
Doing this would also greatly reduce the risk of a random shard of metal finding its way onto the motherboard and potentially bricking it.
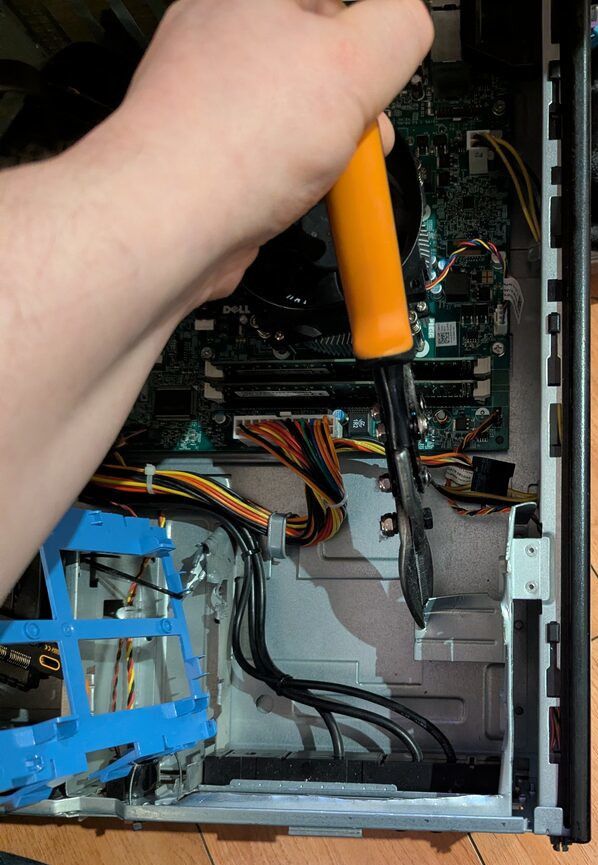
I used a pair of aluminium shears to make all the cuts on my computer.
They did a pretty good job but I wasn't able to get super clean edges and was left with quite a lot of jagged metal in the end.
Wearing proper PPE is an absolute must. Goggles and some cut resistant gloves should be the minimum! I stabbed and cut myself multiple times while working on this PC, thankfully I didn't blind myself...
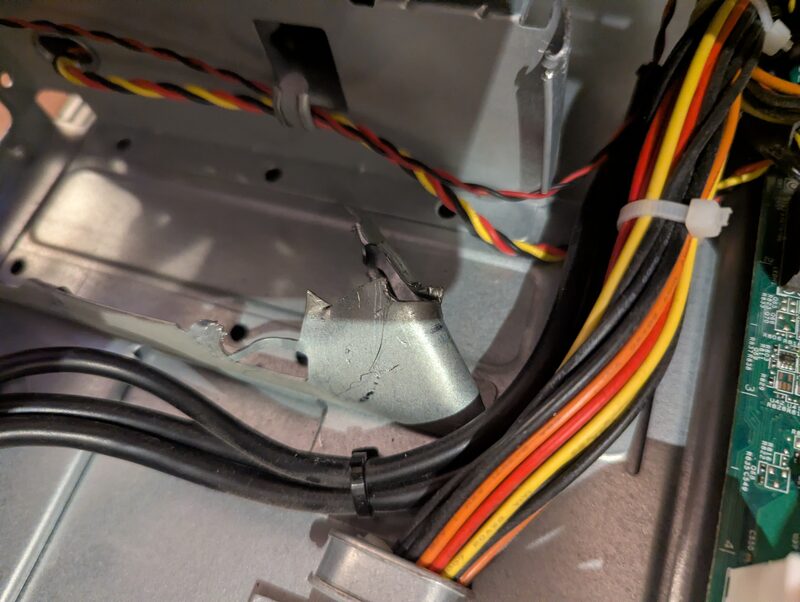
As can be seen by the image below, the cutting left quite a lot of jagged metal quite close to the area where would have liked to put the GPU.
I was very concerned (and still am tbh) that the gpu coming into contact with this jagged metal would at best break the graphics card or at worst cause a fire risk.
Because of this I came up with a cunning plan for suspending the GPU above the bottom of the case by using a modified HDD caddy which was already in the case. (fair warning, I did end up having to buy another to install more storage into the machine)
I have made a small diagram showing how i cut the caddy down to allow for the shape of the GPU.
My caddy wasn't exactly like this but the design still works and worked really quite well.
I used cable ties to suspend the caddy from the remaining parts of the case and the GPU sat perfectly on top of it, well out the way of the jagged metal below.
I have thought quite a lot about this design and although it works quite well, there are some issues and I might in the long run end up making a new "mounting" solution from ABS plastic sheets.
I got this idea from the youtube channel "Explaining Computers" which is a great channel btw!
In two recent videos Christopher makes use of 2mm thick ABS plastic sheets to make both a custom cyberdeck and a custom mITX computer case.
I'm confident that it would be pretty easy to make a little shelf for the gpu to sit on, which would be a bit more stable than the slightly janky modified HDD caddy + cable ties solution that can be seen in my build.
.webp)
At this point things were really coming together. I basically had the system all put together and it was just matter of squishing everything down and slapping its hat on (I like to call lids hats)
It became very obvious that I was going to need either make a hole in the side of the case or get some adapters in order to get the HDMI signal out from the graphics card.
I opted for the adapters. Something worth nothing is what connections are on your GPU of choice and could they potentiall get in the way of your adapters if you opt for the same?
Unfortunately for me I had this issue as the first adapter I bought was blocked by the DVI port on the graphics card.
I thought about trying to modify the card to remove this port but after not too much thinking I realised how ridiculous that was and just bought another adapter.
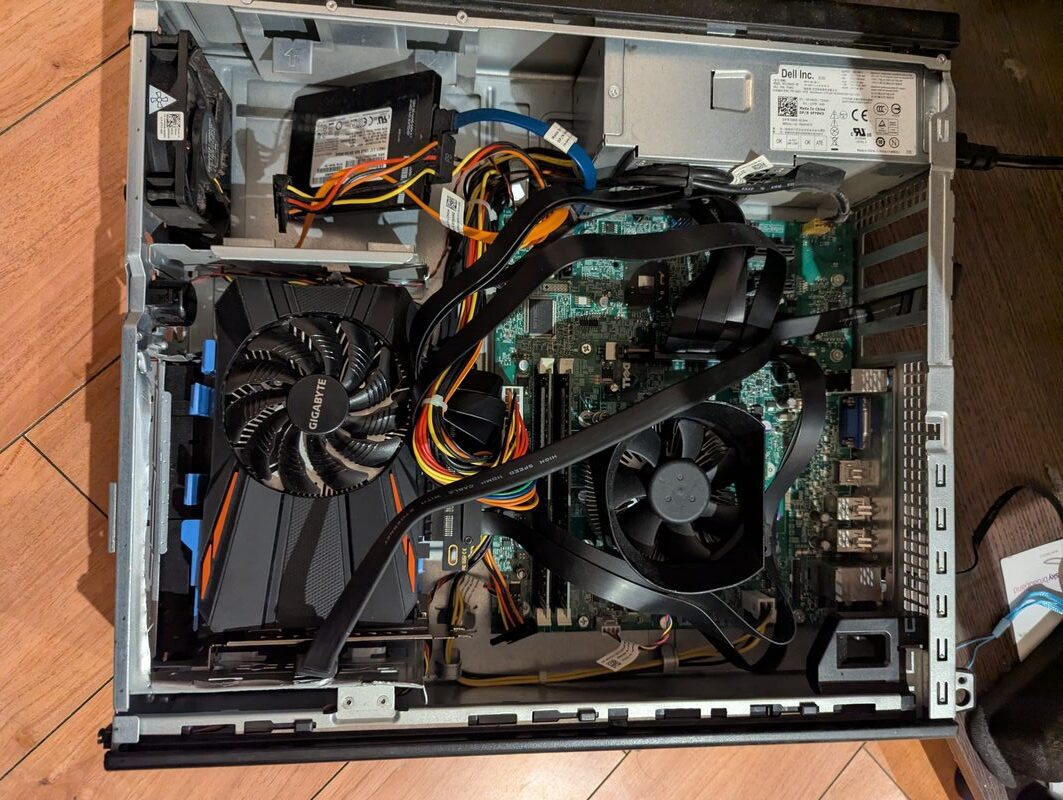
Another thing worth mentioning at this point is cable management. In order to get the GPU to sit in the case nicely I had to move around some cables.
After spotting some very high temps during testing I realised that when the lid was closed the cables I had moved were blocking the fan from spinning properly.
This is why it's very important to keep an eye on temps on something as janky as this. You might quickly find yourself in need of another new GPU if you don't at least let its fan spin.
As can be seen by the image below, the cutting left quite a lot of jagged metal quite close to the area where would have liked to put the GPU.
I was very concerned (and still am tbh) that the gpu coming into contact with this jagged metal would at best break the graphics card or at worst cause a fire risk.
Because of this I came up with a cunning plan for suspending the GPU above the bottom of the case by using a modified HDD caddy which was already in the case. (fair warning, I did end up having to buy another to install more storage into the machine)
I have made a small diagram showing how i cut the caddy down to allow for the shape of the GPU.
My caddy wasn't exactly like this but the design still works and worked really quite well.
I used cable ties to suspend the caddy from the remaining parts of the case and the GPU sat perfectly on top of it, well out the way of the jagged metal below.
I have thought quite a lot about this design and although it works quite well, there are some issues and I might in the long run end up making a new "mounting" solution from ABS plastic sheets.
I got this idea from the youtube channel "Explaining Computers" which is a great channel btw!
In two recent videos Christopher makes use of 2mm thick ABS plastic sheets to make both a custom cyberdeck and a custom mITX computer case.
I'm confident that it would be pretty easy to make a little shelf for the gpu to sit on, which would be a bit more stable than the slightly janky modified HDD caddy + cable ties solution that can be seen in my build.